Digital photography has become a priceless tool in the dental industry. Its use can provide much more consistent results when trying to match shades.
It can be done easily and quickly and helps with more than just the shade. Other information it provides the technician include – labial charaterisation, soft tissue blanching, gingival hue, glaze texture, and internal characteristics such as mamelons and check lines. Any digital camera or smart phone can be used.
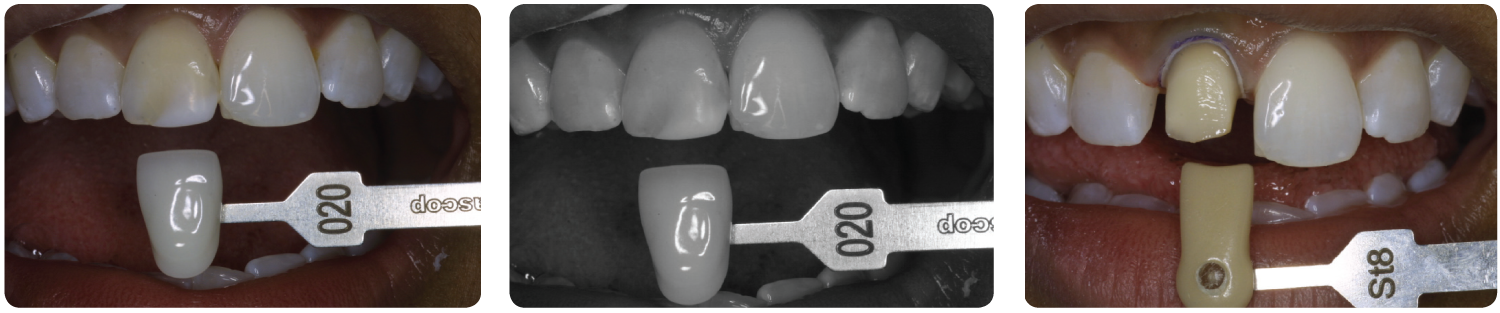
Shade photos should be taken prior to commencing preparation so the tooth does not dry out and lighten in colour. First decide which tooth you wish to match. If the 11 is being restored, it is best to photograph the 21 as it is the tooth that the crown should match.
Decide which shade tab is most like the patients tooth which will be matched. Invert the shade tab(s) and sit it (them) edge to edge with the tooth to be matched. Ensure the patients mouth is open to create a black background behind tooth and shade tab and take your first photo.
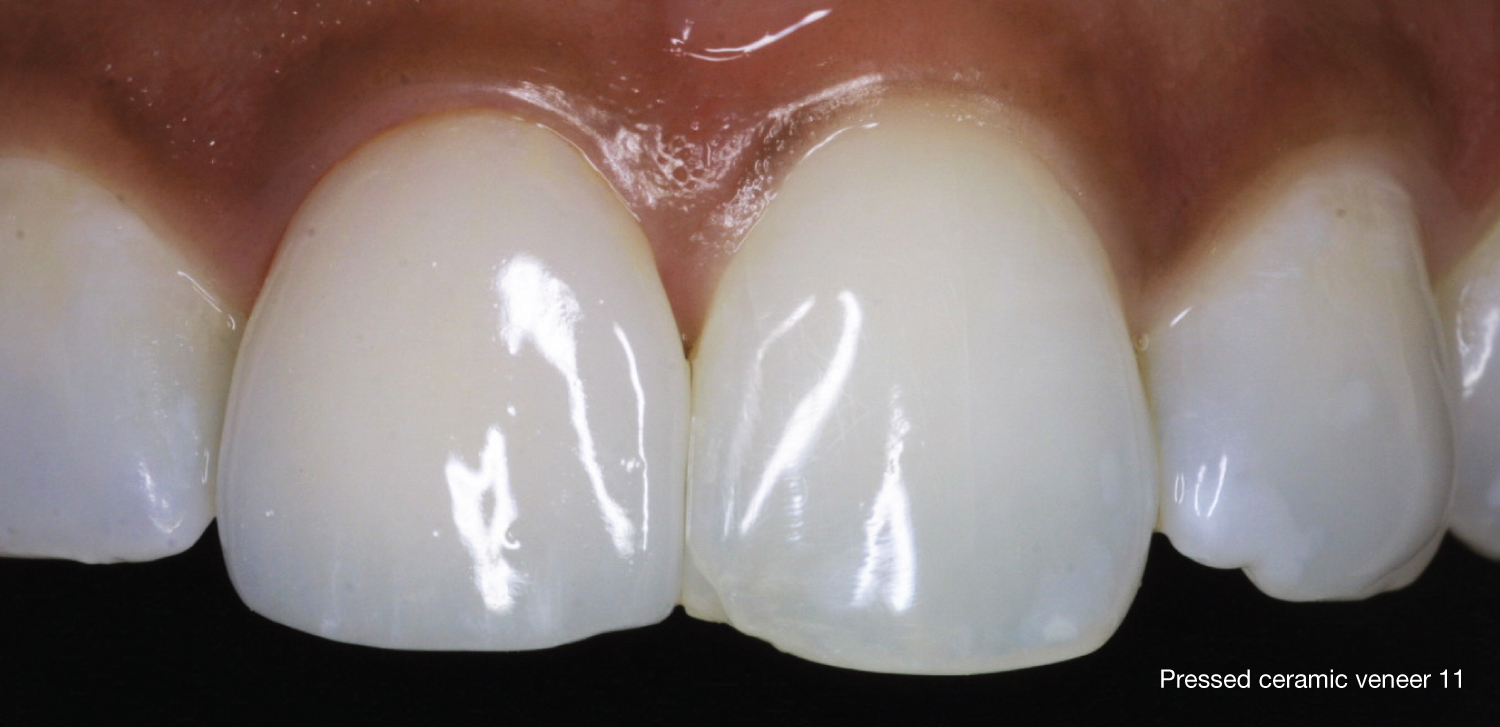
Notice the finish on the teeth which allows the technician to know what texture and glaze techniques to use. It also shows the labial characterisation in detail ensuring the light reflection will be matched with accuracy. Shape and contour will be designed from the teeth on the model therefore not making it necessary to photograph any other teeth. A second and third photo with different shade tabs can help too. For all ceramic crowns and veneers please provide photos of the underlying preparation so it can be masked when necessary.
A black and white photo can also help with getting the value correct but this can be done in the laboratory.